

基于Java的仓库管理系统设计与实现(六)
基于Java的仓库管理系统设计与实现(六)
最近比较忙,每天进度比较慢,不过大部分都比较顺利,菜单树等等,目前正在处理后端出入库管理,对其重新考虑了一下思路,改动还是比较大,并且还使用到了触发器。除此之外,考虑到用户注销,需要实现token过期思路,这里考虑本地部署或服务器问题,没有使用redis,暂时使用了map去维护一个黑名单列表,用户取消登陆后请求接口,添加到黑名单实现失效。
1.后端
1.1 使用Map集合维护黑名单
这里是在JwtUtil中编写的,编写添加黑名单方法,校验是否在黑名单中存在,以及定时清除(因为添加黑名单时,值为过期时间)。
JwtUtil.java
package cn.xy21lin.wms_lin.util;

import cn.hutool.core.convert.Convert;
import cn.hutool.core.convert.NumberWithFormat;
import cn.hutool.core.date.DateTime;
import cn.hutool.jwt.JWT;
import cn.hutool.jwt.JWTPayload;
import cn.hutool.jwt.JWTUtil;
import cn.xy21lin.wms_lin.config.CustomerAuthenticationException;
import org.springframework.scheduling.annotation.Scheduled;
import org.springframework.stereotype.Component;

import java.util.Map;
import java.util.concurrent.ConcurrentHashMap;


@Component
public class JwtUtil {
    // JWT密钥
    private static final String SECRET_KEY = "23306010225";
    // Token过期时间,单位为毫秒,这里设置为1天
    private static final long EXPIRATION_TIME = 86400000;
    // 维护黑名单,用于存储注销的Token
    private static final ConcurrentHashMap<String, Long> blackList = new ConcurrentHashMap<>();

    /**
     * 生成JWT Token
     *
     * @param payload 包含用户信息的Map对象
     * @return 生成的JWT Token
     */
    public static String createToken(Map<String, Object> payload) {
        // 获取当前时间
        DateTime now = DateTime.now();
        // 计算Token的过期时间
        DateTime date = new DateTime(now.getTime() + EXPIRATION_TIME);

        // 设置签发时间
        payload.put(JWTPayload.ISSUED_AT, now);
        // 设置过期时间
        payload.put(JWTPayload.EXPIRES_AT, date);
        // 设置生效时间,确保Token在签发后立即生效
        payload.put(JWTPayload.NOT_BEFORE, now);

        // 使用Hutool工具类生成JWT Token
        return JWTUtil.createToken(payload, SECRET_KEY.getBytes());
    }


    /**
     * 解析JWT Token,获取Payload信息
     *
     * @param token 需要解析的JWT Token
     * @return 解析后的Payload对象
     */
    public static JWTPayload parseToken(String token) {
        JWT jwt = null;
        // 使用Hutool工具类解析JWT Token
        try {
            jwt = JWTUtil.parseToken(token);
        } catch (Exception e) {
            throw new CustomerAuthenticationException("token无效");
        }

        // 设置密钥并验证Token的签名
        if (!jwt.setKey(SECRET_KEY.getBytes()).verify() || !jwt.validate(0)) {
            throw new CustomerAuthenticationException("token无效");
        }

//        // 验证Token是否过期
//        if (!jwt.validate(0)) {
//            throw new CustomerAuthenticationException("Token已过期");
//        }

        // 返回解析后的Payload对象
        return jwt.getPayload();
    }

    /**
     * 将Token添加到黑名单
     *
     * @param token 需要添加到黑名单的Token
     */
    public static void addToBlacklist(String token) {
        try {
            // 解析 JWT 令牌
            JWT jwt = JWTUtil.parseToken(token);
            //获取一下过期时间
            NumberWithFormat claim = (NumberWithFormat) JwtUtil.parseToken(token).getClaim(JWTPayload.EXPIRES_AT);
            long expiredTime = Convert.toDate(claim).getTime();
            //System.out.println("获取到的过期时间:" + expiredTime);
            blackList.put(token, expiredTime);
        } catch (Exception e) {
            // 捕获并抛出自定义异常
            throw new CustomerAuthenticationException("添加黑名单出错: " + e.getMessage());
        }
    }

    /**
     * 检查Token是否在黑名单中
     *
     * @param token 需要检查的Token
     * @return 如果Token在黑名单中,返回true;否则返回false
     */
    public static boolean isTokenBlacklisted(String token) {
        Long expirationTime = blackList.get(token);
        if (expirationTime == null) {
            return false;
        }
        // 检查Token是否已过期
        return System.currentTimeMillis() < expirationTime;
    }

    /**
     * 定期清理过期的Token
     */
    @Scheduled(fixedRate = 3600000) // 每小时执行一次
    public void cleanExpiredTokens() {
        //System.out.println("执行了自动清除");
        long currentTime = System.currentTimeMillis();
        blackList.entrySet().removeIf(entry -> entry.getValue() < currentTime);
    }
}
- 需要在
SpringBootApplication启动类上添加注解@EnableScheduling,启动定时功能。 - 编写注销接口,添加黑名单(我为了省事,写在了
UserController里,本来打算写在LoginController中,但是前端封装的axios,过滤了/auth/**,不携带token)
    @GetMapping("/logout")
    @Operation(summary = "注销登录", description = "注销登录")
    @ApiResponse(responseCode = "200", description = "注销登录成功", content = @Content(schema =  @Schema(example = "{\"code\": 200, \"message\": \"注销登录成功\", \"data\": null, \"success\": \"true\"}")))
    public Result<?> logout(
            @RequestHeader String token
    ) {
        //先将token放入黑名单
        JwtUtil.addToBlacklist(token);
        //返回响应
        return Result.success().setMessage("注销登录成功");
    }
- 在Jwt过滤器中校验是否在黑名单中
JwtFilter.java
JwtFilter.java
@Component
public class JwtFilter extends OncePerRequestFilter {
    //...省略其他方法

    /**
     * 验证请求中的Token。
     *
     * @param request 请求对象
     * @param response 响应对象
     * @throws AuthenticationException 如果Token无效或缺失,则抛出该异常
     */
    private void verifyToken(HttpServletRequest request, HttpServletResponse response) throws AuthenticationException {
        // 从请求头中获取Token
        String token = request.getHeader("token");
        // 如果请求头中没有Token,则从请求参数中获取
        if (token == null || token.isEmpty()) {
            token = request.getParameter("token");
        }
        // 如果仍然没有Token,则抛出异常
        if (token == null || token.isEmpty()) {
            throw new CustomerAuthenticationException("缺少必要参数token");
        }
        // Token存在,尝试从Redis中获取对应的Token值
//        String tokenKey = "token:" + token;
//        String redisToken = redisUtils.get(tokenKey);
        // 校验Redis中的Token是否存在并且与提供的Token一致
//        if (redisToken == null || !redisToken.equals(token)) {
//            throw new CustomerAuthenticationException("token已过期或无效");
//        }
        // 检测是否在黑名单中
        if (JwtUtil.isTokenBlacklisted(token)) {
            System.out.println("token在黑名单,token无效");
            throw new CustomerAuthenticationException("token无效");
        }

        // 解析Token获取用户名
        String username = JwtUtil.parseToken(token).getClaim("username").toString();
        if (username == null) {
            throw new CustomerAuthenticationException("token无效");
        }
        // 根据用户名加载用户详情
        UserDetails userDetails = userDetailsService.loadUserByUsername(username);
        if (userDetails == null) {
            throw new CustomerAuthenticationException("token无效");
        }
        // 所有验证通过,创建认证令牌
        UsernamePasswordAuthenticationToken authenticationToken =
                new UsernamePasswordAuthenticationToken(userDetails, null, userDetails.getAuthorities());
        // 设置请求的详细信息
        authenticationToken.setDetails(new WebAuthenticationDetailsSource().buildDetails(request));
        // 将认证信息存入SecurityContext
        SecurityContextHolder.getContext().setAuthentication(authenticationToken);
    }
}
1.2 菜单树
- 菜单路由树(具体路由处理交给前端)
MenusTreeUtil.java
package cn.xy21lin.wms_lin.util;

import cn.xy21lin.wms_lin.entity.Menu;

import java.util.ArrayList;
import java.util.HashMap;
import java.util.List;
import java.util.Map;

public class MenusTreeUtil {
    public static  List<Menu> buildMenuTree(List<Menu> menus) {
        Map<Long, Menu> menuMap = new HashMap<>();
        List<Menu> rootMenus = new ArrayList<>();
        // 将所有菜单放入map中
        for (Menu menu : menus) {
            menuMap.put(menu.getId(), menu);
        }

        // 构建菜单树
        for (Menu menu : menus) {
            if (menu.getParentId() == null || menu.getParentId() == 0) {
                rootMenus.add(menu);
            } else {
                Menu parentMenu = menuMap.get(menu.getParentId());
                if (parentMenu != null) {
                    if (parentMenu.getChildren() == null) {
                        parentMenu.setChildren(new ArrayList<>());
                    }
                    parentMenu.getChildren().add(menu);
                }
            }
        }

        return rootMenus;
    }
}
- 前端处理动态构建路由
  import { useRouter } from 'vue-router';
  import request from '@/utils/request.js';
  const router = useRouter();
  // 首先把你需要动态路由的组件地址全部获取
  let modules = import.meta.glob('@/views/**/*.vue');

  // 路由处理逻辑
  function generateRoutes(menus, parentPath = '') {
    menus.forEach((menu) => {
      const currentPath = [];
      // 只处理菜单类型为1的项(菜单项)
      if (menu.menuType === 1) {
        // 处理路径拼接逻辑(兼容带斜杠和不带斜杠的情况)
        const currentPath = [parentPath, menu.path]
          .join('/')
          .replace(/\/+/g, '/')
          .replace(/\/$/, ''); // 移除末尾斜杠
        // 检查是否已存在该路由
        if (!router.hasRoute(currentPath)) {
          // 构建正确的路径
          const correctPath = `/src/views${currentPath}.vue`;
          // 获取对应的导入函数
          const importFunction = modules[correctPath];
          router.addRoute({
            path: currentPath,
            name: currentPath.slice(1).replace(/\//g, '-') || 'root', // 生成路由名称
            component: () => importFunction(),
            meta: {
              menuId: menu.id,
              title: menu.menuName
            }
          });
        }
      }

      // 递归处理子菜单
      if (menu.children && menu.children.length > 0) {
        generateRoutes(menu.children, currentPath);
      }
    });
  }

  // 获取菜单路由树方法
  const getMenuList = async () => {
    try {
      const response = await request.post('system/menu/list');

      if (response.code === 200) {
        menus.value = response.data;
        generateRoutes(menus.value); // 生成路由
        //这里就是封装的一个ELMessage
        showMessage('success', '菜单加载成功');
        //这是获取新增/编辑对话框中的树方法,下面会给出
        getMenuTreeList(); // 获取菜单树
      } else {
        showMessage('error', response.message);
      }
    } catch (error) {
      showMessage('error', '获取菜单失败');
    }
  };
注: 这里有个大坑,不知道是不是我配置的问题,尝试了挺多办法,百度搜到的就是let modules = import.meta.glob('@/views/**/*.vue');这样子去获取全部的一个vue组件,然后再去以键值的方式去加载具体的哪个,当时试过好几次就是不行,直到看到一个评论说,把@改成/src就可以了,不识别@,改成/src以后,果然可以了,但是我明明配置了@,其余组件都是正常能导入,但是const correctPath = /src/views${currentPath}.vue;在这里使用@/views${currentPath}.vue就是不可以,很奇怪。
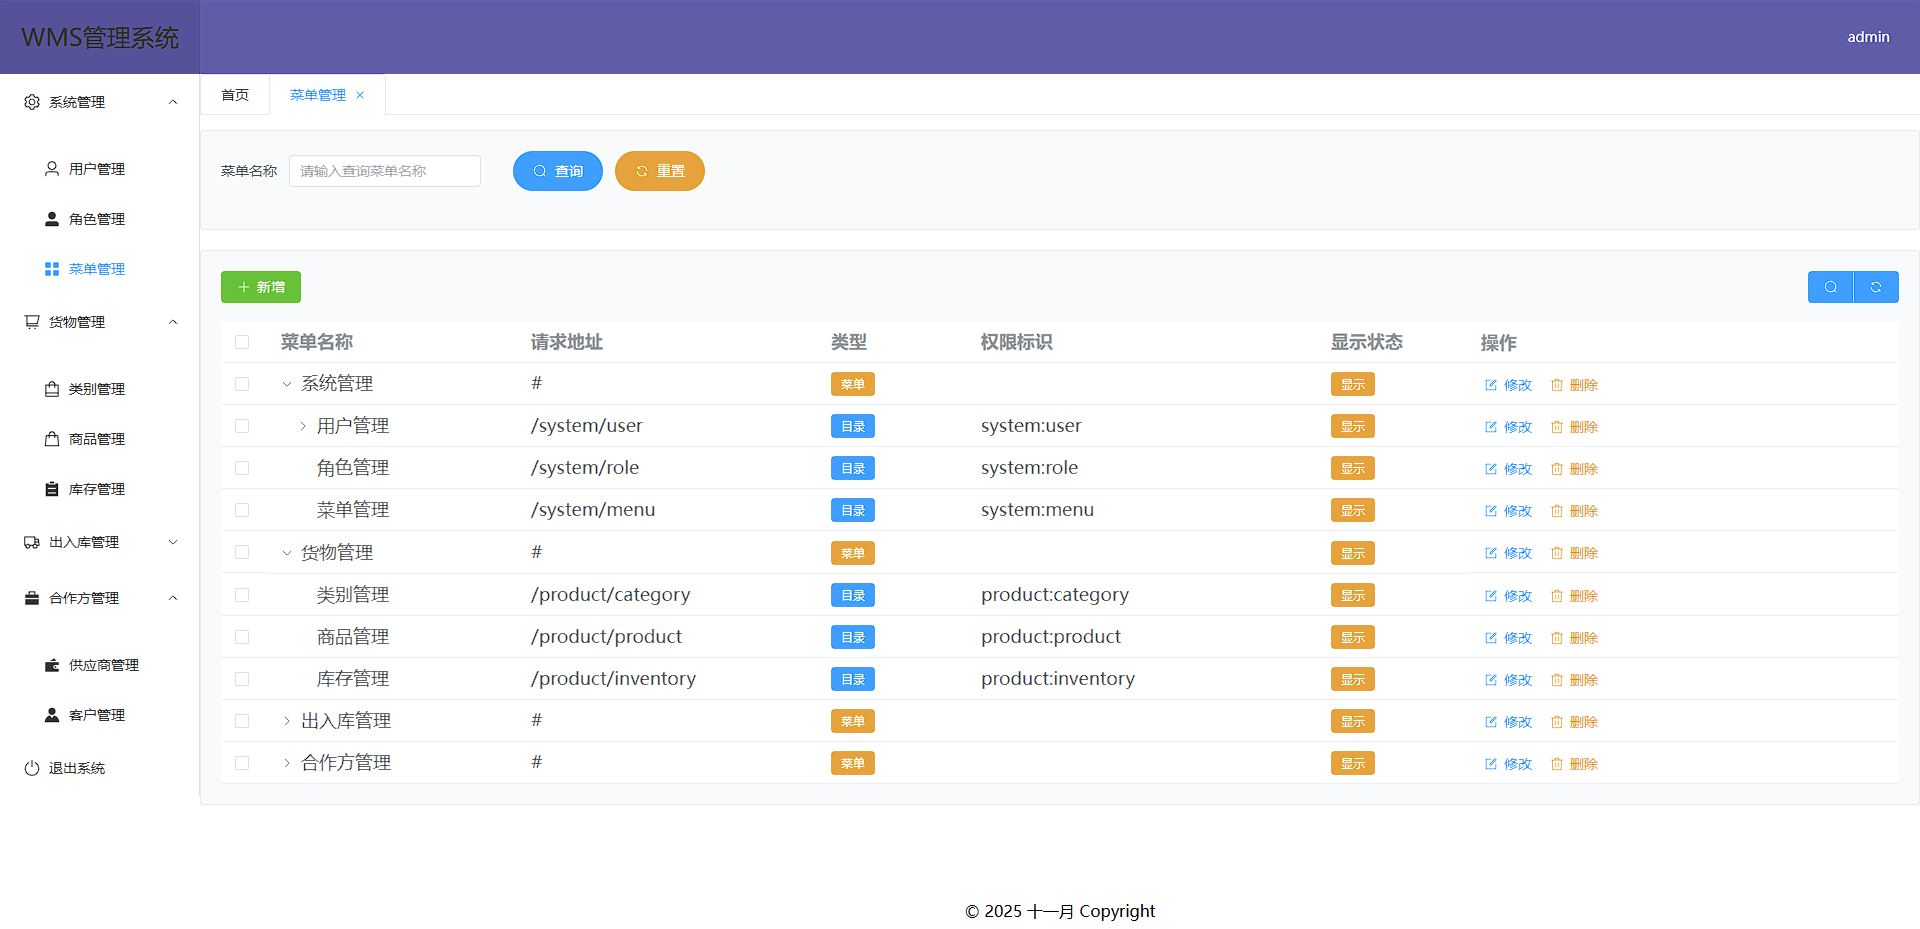
- 当前菜单路由树界面
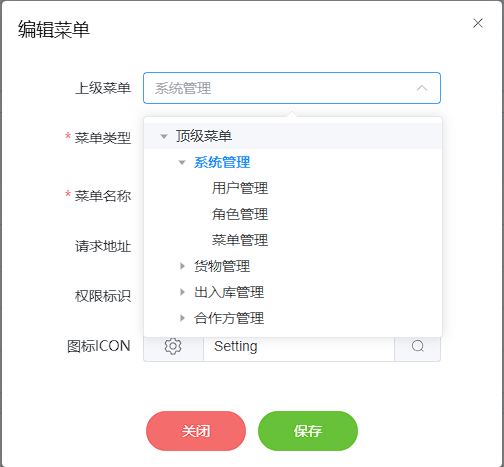
- 对话框菜单树(很相似,方便顶级父菜单显示,我手动设置了个顶级菜单,不设置也行,不选就是了)
package cn.xy21lin.wms_lin.util;

import cn.xy21lin.wms_lin.entity.Menu;
import cn.xy21lin.wms_lin.vo.MenuTreeVo;

import java.util.List;
import java.util.Map;
import java.util.HashMap;

public class MenuTreeUtil {
    public static MenuTreeVo buildMenuTree(List<Menu> menus) {
        MenuTreeVo rootMenuTree = new MenuTreeVo(0L, "顶级菜单");
        // 先构建菜单的映射,方便查找
        Map<Long, MenuTreeVo> menuMap = new HashMap<>();
        // 初始化菜单映射
        for (Menu menu : menus) {
            menuMap.put(menu.getId(), new MenuTreeVo(menu.getId(), menu.getMenuName()));
        }
        // 构建菜单树
        for (Menu menu : menus) {
            Long parentId = menu.getParentId();
            if (parentId == null || parentId == 0) {
                // 父级菜单
                rootMenuTree.getChildren().add(menuMap.get(menu.getId()));
            } else {
                // 查找父菜单
                MenuTreeVo parent = menuMap.get(parentId);
                if (parent != null) {
                    parent.getChildren().add(menuMap.get(menu.getId()));
                }
            }
        }
        return rootMenuTree;
    }
}
- 前端对话框菜单树方法(就是前面的
getMenuTreeList方法),并且我才请求菜单路由树的时候就请求了,并且通过pinia持久化存储了,后面menu.vue组件直接在store中获取,不必在请求。
// 持久化store
import { defineStore } from 'pinia'

// 定义一个store,第一个参数是store的唯一标识,建议使用文件名,第二个参数使用setup()函数 或 option 对象,这里使用setup()函数
// 使用export const useXXXStore = defineStore('web',()=>{...}) 定义一个store,并导出一个useXXXStore函数,调用该函数可以获取到该store的实例
// useXXXStore 命名规范,在标识前加use,后加store
export const useMenuStore = defineStore('menu', () => {
    const menus = reactive({
        menuData: [],
    })


    const setMenuData = (data) => {
        menus.menuData = data
    }

    //返回定义的数据
    return {
        menus,
        setMenuData
    }
},
    // 主要就是这一段  注意位置,是在defineStore第三个参数的位置
    {
        persist: true // 开启持久化
    })


  // 这里才是菜单树方法,注释都是我写的时候就写了,也很简单,毕竟后端处理完根据前端组件需求,直接返回了指定格式,直接存就可以
  // 获取菜单树方法
  const getMenuTreeList = async () => {
    try {
      const response = await request.post('system/menu/menuTreeData');

      if (response.code === 200) {
        menuStore.setMenuData(response.data);
      }
    } catch (error) {
      showMessage('error', '获取菜单树失败');
    }
  };
menu.vue组件使用(使用的是TreeSelect 树形选择)
<!--...省略其他代码 -->
    <el-form-item label="上级菜单" class="form-item-center" :label-width="formLabelWidth">
    <!-- <el-input autocomplete="off" v-model="dialogForm.parentId" placeholder="请选择父级别菜单" /> -->
    <el-tree-select v-model="dialogForm.parentId" :data="menuData" check-strictly
    :render-after-expand="false" />
    </el-form-item>
<!--...省略其他代码 -->

<script setup>
  import request from '@/utils/request';
  //使用对应store就需要去导入它
  import { useMenuStore } from '@/store/menu';
  // 设置响应式数据,是一个数组
  const menuData = ref([]);
  //... 省略其他代码
  // 修改后的获取菜单方法
  //获取菜单方法,这里是在获取表格中菜单列表时候,就把菜单树数据从store中获取后添加了
  const getMenuList = async () => {
    try {
      const response = await request.post('system/menu/list');
      if (response.code === 200) {
        tableData.value = response.data;
        // 设置菜单树数据
        menuData.value.push(menuStore.menus.menuData);
      }
    } catch (error) {
      showMessage('error', '获取菜单失败');
    } finally {
      isTableLoading.value = false;
    }
  };
  //... 省略其他代码
</script>
- 菜单树界面
- 菜单路由树返回的格式(忘记给出返回格式了,补上,只用关注data中的内容,下面的菜单树也一样)
// 菜单路由树格式
{
    "code": 200,
    "message": "获取成功",
    "data": [
        {
            "id": 1,
            "menuName": "系统管理",
            "path": "#",
            "parentId": 0,
            "icon": "Setting",
            "orderNum": 0,
            "menuType": 0,
            "permissionName": null,
            "description": "系统管理总菜单",
            "isDeleted": 0,
            "isHidden": 0,
            "children": [
                {
                    "id": 2,
                    "menuName": "用户管理",
                    "path": "/system/user",
                    "parentId": 1,
                    "icon": "User",
                    "orderNum": 1,
                    "menuType": 1,
                    "permissionName": "system:user",
                    "description": "用户管理目录",
                    "isDeleted": 0,
                    "isHidden": 0,
                    "children": [
                        {
                            "id": 17,
                            "menuName": "新增用户",
                            "path": "/system/user/add",
                            "parentId": 2,
                            "icon": "",
                            "orderNum": 2,
                            "menuType": 2,
                            "permissionName": "system:user:add",
                            "description": "新增用户按钮",
                            "isDeleted": 0,
                            "isHidden": 0
                        }
                    ]
                },
                {
                    "id": 3,
                    "menuName": "角色管理",
                    "path": "/system/role",
                    "parentId": 1,
                    "icon": "UserFilled",
                    "orderNum": 1,
                    "menuType": 1,
                    "permissionName": "system:role",
                    "description": "角色管理目录",
                    "isDeleted": 0,
                    "isHidden": 0
                },
                {
                    "id": 4,
                    "menuName": "菜单管理",
                    "path": "/system/menu",
                    "parentId": 1,
                    "icon": "Menu",
                    "orderNum": 1,
                    "menuType": 1,
                    "permissionName": "system:menu",
                    "description": null,
                    "isDeleted": 0,
                    "isHidden": 0
                }
            ]
        },
        {
            "id": 5,
            "menuName": "货物管理",
            "path": "#",
            "parentId": 0,
            "icon": "ShoppingTrolley",
            "orderNum": 0,
            "menuType": 0,
            "permissionName": null,
            "description": null,
            "isDeleted": 0,
            "isHidden": 0,
            "children": [
                {
                    "id": 6,
                    "menuName": "类别管理",
                    "path": "/product/category",
                    "parentId": 5,
                    "icon": "ShoppingBag",
                    "orderNum": 1,
                    "menuType": 1,
                    "permissionName": "product:category",
                    "description": null,
                    "isDeleted": 0,
                    "isHidden": 0
                },
                {
                    "id": 7,
                    "menuName": "商品管理",
                    "path": "/product/product",
                    "parentId": 5,
                    "icon": "Goods",
                    "orderNum": 1,
                    "menuType": 1,
                    "permissionName": "product:product",
                    "description": null,
                    "isDeleted": 0,
                    "isHidden": 0
                },
                {
                    "id": 8,
                    "menuName": "库存管理",
                    "path": "/product/inventory",
                    "parentId": 5,
                    "icon": "List",
                    "orderNum": 1,
                    "menuType": 1,
                    "permissionName": "product:inventory",
                    "description": null,
                    "isDeleted": 0,
                    "isHidden": 0
                }
            ]
        },
        {
            "id": 9,
            "menuName": "出入库管理",
            "path": "#",
            "parentId": 0,
            "icon": "Van",
            "orderNum": 0,
            "menuType": 0,
            "permissionName": null,
            "description": null,
            "isDeleted": 0,
            "isHidden": 0,
            "children": [
                {
                    "id": 10,
                    "menuName": "出入库记录",
                    "path": "/warehouse/inoutRecord",
                    "parentId": 9,
                    "icon": "Ticket",
                    "orderNum": 1,
                    "menuType": 1,
                    "permissionName": "warehouse:inoutRecord",
                    "description": null,
                    "isDeleted": 0,
                    "isHidden": 0
                },
                {
                    "id": 11,
                    "menuName": "出入库明细",
                    "path": "/warehouse/inoutDetail",
                    "parentId": 9,
                    "icon": "Tickets",
                    "orderNum": 1,
                    "menuType": 1,
                    "permissionName": "warehouse:inoutDetail",
                    "description": null,
                    "isDeleted": 0,
                    "isHidden": 0
                },
                {
                    "id": 18,
                    "menuName": "仓库管理",
                    "path": "/warehouse/warehouse",
                    "parentId": 9,
                    "icon": "House",
                    "orderNum": 1,
                    "menuType": 1,
                    "permissionName": "warehouse:warehouse",
                    "description": "仓库管理目录",
                    "isDeleted": 0,
                    "isHidden": 0
                },
                {
                    "id": 25,
                    "menuName": "库存预警管理",
                    "path": "/warehouse/stockWarning",
                    "parentId": 9,
                    "icon": "WarnTriangleFilled",
                    "orderNum": 0,
                    "menuType": 1,
                    "permissionName": "warehouse:stockWarning",
                    "description": null,
                    "isDeleted": 0,
                    "isHidden": 0
                }
            ]
        },
        {
            "id": 12,
            "menuName": "合作方管理",
            "path": "#",
            "parentId": 0,
            "icon": "Briefcase",
            "orderNum": 1,
            "menuType": 0,
            "permissionName": null,
            "description": null,
            "isDeleted": 0,
            "isHidden": 0,
            "children": [
                {
                    "id": 13,
                    "menuName": "供应商管理",
                    "path": "/business/supplier",
                    "parentId": 12,
                    "icon": "WalletFilled",
                    "orderNum": 1,
                    "menuType": 1,
                    "permissionName": "business:supplier",
                    "description": null,
                    "isDeleted": 0,
                    "isHidden": 0
                },
                {
                    "id": 14,
                    "menuName": "客户管理",
                    "path": "/business/client",
                    "parentId": 12,
                    "icon": "Avatar",
                    "orderNum": 1,
                    "menuType": 1,
                    "permissionName": "business:client",
                    "description": null,
                    "isDeleted": 0,
                    "isHidden": 0
                }
            ]
        }
    ],
    "success": true
}
- 菜单树格式
{
    "code": 200,
    "message": "获取成功",
    "data": {
        "label": "顶级菜单",
        "value": 0,
        "children": [
            {
                "label": "系统管理",
                "value": 1,
                "children": [
                    {
                        "label": "用户管理",
                        "value": 2,
                        "children": [
                            {
                                "label": "新增用户",
                                "value": 17,
                                "children": []
                            },
                            {
                                "label": "123",
                                "value": 27,
                                "children": []
                            }
                        ]
                    },
                    {
                        "label": "角色管理",
                        "value": 3,
                        "children": []
                    },
                    {
                        "label": "菜单管理",
                        "value": 4,
                        "children": []
                    }
                ]
            },
            {
                "label": "货物管理",
                "value": 5,
                "children": [
                    {
                        "label": "类别管理",
                        "value": 6,
                        "children": []
                    },
                    {
                        "label": "商品管理",
                        "value": 7,
                        "children": []
                    },
                    {
                        "label": "库存管理",
                        "value": 8,
                        "children": []
                    }
                ]
            },
            {
                "label": "出入库管理",
                "value": 9,
                "children": [
                    {
                        "label": "出入库记录",
                        "value": 10,
                        "children": []
                    },
                    {
                        "label": "出入库明细",
                        "value": 11,
                        "children": []
                    },
                    {
                        "label": "仓库管理",
                        "value": 18,
                        "children": []
                    },
                    {
                        "label": "库存预警管理",
                        "value": 25,
                        "children": []
                    }
                ]
            },
            {
                "label": "合作方管理",
                "value": 12,
                "children": [
                    {
                        "label": "供应商管理",
                        "value": 13,
                        "children": []
                    },
                    {
                        "label": "客户管理",
                        "value": 14,
                        "children": []
                    }
                ]
            }
        ]
    },
    "success": true
}
2. 数据库触发器
这里主要记录触发器。
2.1 库存预警触发器
-- 修改一下结束符
DELIMITER //

CREATE TRIGGER stock_warning_trigger
BEFORE UPDATE ON biz_inventory
FOR EACH ROW
BEGIN
    -- 定义最小库存
    DECLARE min_stock_temp INT;
    -- 定义库存预警表id
    DECLARE stock_id_temp INT;
    DECLARE record_exists INT DEFAULT 0;
    -- 获取产品的最小库存  这里INTO,是将查询到的min_stock 赋值给 定义的变量 min_stock_temp,New是更新后新纪录的引用,对应的OLD就是老记录,也就是修改前
    SELECT min_stock INTO min_stock_temp FROM biz_product WHERE biz_product.id = NEW.product_id;

    -- 检查库存预警表中是否存在记录
    SELECT COUNT(*) INTO record_exists FROM biz_stock_warning WHERE product_id = NEW.product_id and is_flag = 0;

    -- 检查库存是否低于最小库存
    IF NEW.quantity < min_stock_temp THEN
        IF record_exists > 0 THEN
        -- 存在预警记录,直接更新预警时间和当前库存
          UPDATE biz_stock_warning SET biz_stock_warning.current_stock = NEW.quantity and biz_stock_warning.warning_time = NOW() WHERE id = stock_id_temp and is_flag = 0;
        ELSE
          -- 插入库存预警信息到库存预警表
            INSERT INTO biz_stock_warning (product_id, current_stock)
            VALUES (NEW.product_id, NEW.quantity);
        END IF;
    END IF;

    -- 检查库存是否超过了最小库存
    IF NEW.quantity > min_stock_temp THEN
        -- 检查库存预警表中是否存在记录
        SELECT COUNT(*) INTO record_exists FROM biz_stock_warning WHERE product_id = NEW.product_id and is_flag = 0;
        IF record_exists > 0 THEN
            -- 获取库存预警表中的记录 ID
            SELECT id INTO stock_id_temp FROM biz_stock_warning WHERE product_id = NEW.product_id  and is_flag = 0;
            -- 更新 is_flag 字段为 1  新设置的字段,标识这个记录的处理状态,不然同产品可以有多个预警记录,更新时候不根据状态,那问题太大了,如果有未处理的记录,直接覆盖上去就可以,我是这样子想的
            UPDATE biz_stock_warning SET is_flag = 1 WHERE id = stock_id_temp;
        END IF;
    END IF;
END //

-- 结束符号改回;
DELIMITER ;

-- 删除触发器
DROP TRIGGER stock_warning_trigger;
2.2 自增菜单触发器
这里是因为,我是用管理员账号进行增加菜单操作时,刷新发现没有,才想起来,我还要手动添加权限才可以,比较烦人,所以写这个触发器,新增后会自动添加权限到管理员角色下,就一句话,比较简单。
DELIMITER //

-- 注意这里,是AFTER INSERT 新增后
CREATE TRIGGER menu_insert_admin
AFTER INSERT ON sys_menu
FOR EACH ROW
BEGIN
    -- 1是管理员角色id,NEW.id也就是新增菜单的自增的主键id了
	INSERT INTO sys_role_menu VALUES(1,NEW.id);
END //

DELIMITER ;

-- 删除触发器
DROP TRIGGER menu_insert_admin
2.3 审核通过触发器
这里是考虑,每次出入库,都需要管理员去审核后,才能对产品进行的操作,本来打算使用代码实现,刚好在弄触发器,想着可以使用触发器试试,还没验证出库,还没写到那里,就验证了新产品入库,嘎嘎。
DELIMITER //

CREATE TRIGGER insertOrUpdate_product
BEFORE UPDATE ON biz_inout_record
FOR EACH ROW
BEGIN
    -- 定义产品id
    DECLARE productId INT;
    -- 定义产品名称
    DECLARE productName VARCHAR(255);
    -- 定义分类id
    DECLARE categoryId INT;
    -- 定义仓库id
    DECLARE warehouseyId INT;
    -- 定义产品最小库存
    DECLARE minStock INT;
    -- 定义产品售价
    DECLARE salePrice DECIMAL(10, 2);
    -- 定义产品进价
    DECLARE purchasePrice DECIMAL(10, 2);
    -- 定义产品单位
    DECLARE productUnit VARCHAR(50);
    -- 定义产品规格
    DECLARE productSpec VARCHAR(255);
    -- 定义产品更新数量
    DECLARE quantityNum INT;

    IF NEW.audit_status = '已通过' THEN
        -- 如果productId 不为空 就是更新,否则新增
        SELECT product_id, product_name, category_id, warehouse_id, min_stock, sale_price, purchase_price, product_unit, product_spec, quantity
        INTO productId, productName, categoryId, warehouseyId, minStock, salePrice, purchasePrice, productUnit, productSpec, quantityNum
        FROM biz_inout_detail
        WHERE record_id = NEW.record_no;

        IF productId IS NOT NULL THEN
            -- 不为空 更新
            -- 判断 入库 就是 +  出库 就是 -  这里还在想,更新产品入库,到底能不能修改其他内容,规格、单位等,如果修改了,应该就算新产品了,所以还是没对其他字段更新。
            IF NEW.operation_type = '入库' THEN
                UPDATE biz_inventory SET quantity = quantity + quantityNum WHERE product_id = productId;
            ELSE
                UPDATE biz_inventory SET quantity = quantity - quantityNum WHERE product_id = productId;
            END IF;
        ELSE
            -- 新增产品
            INSERT INTO biz_product (`name`, category_id, spec, unit, purchase_price, sale_price, min_stock)
            VALUES (productName, categoryId, productSpec, productUnit, purchasePrice, salePrice, minStock);

            -- 获取新增产品的 productId
            SET productId = LAST_INSERT_ID();

            -- 新增库存
            INSERT INTO biz_inventory (warehouse_id, product_id, quantity)
            VALUES (warehouseyId, productId, quantityNum);
        END IF;
    END IF;
END //

DELIMITER ;

-- 删除触发器
DROP TRIGGER insertOrUpdate_product;
注: 写的使用就在想,我入库有数量,是对应的库存信息啊,可是我产品库存是有单独的表的,那我这个产品id都不知道,怎么去存库存呢,老样子,百度看看,不写这玩意真不知道,给我推荐了这个方法LAST_INSERT_ID(),解释为:使用 LAST_INSERT_ID() 函数获取新插入记录的 productId。这个时候,获取id方法解决了,我又在考虑,我一条一条加,肯定能获取到最新一次的,要是多个用户同时添加,并发一下不久寄寄了?再搜搜看。解释:在并发操作场景下,直接使用 SET productId = LAST_INSERT_ID(); 通常不会出问题,因为 LAST_INSERT_ID() 是一个会话级别的函数,它返回的是当前会话中最后一次插入操作所生成的自增 ID 值,不同会话之间的 LAST_INSERT_ID() 调用是相互独立的,没理解的话再看看例子。(注意注意,这个是在mysql中使用的,不同数据库是不一样的。)
假设有两个并发的数据库连接(会话 A 和会话 B)同时执行插入操作:
- 会话 A 执行 INSERT 操作插入一条记录到 biz_product 表,生成自增 ID 为 100。此时会话 A 调用 LAST_INSERT_ID() 会返回 100。
- 与此同时,会话 B 也执行 INSERT 操作插入一条记录到 biz_product 表,生成自增 ID 为 101。会话 B 调用 LAST_INSERT_ID() 会返回 101,而会话 A 的 LAST_INSERT_ID() 仍然返回 100,不会受到会话 B 插入操作的影响。